Wednesday, August 3, 2011
Vegetarian Charquicán Recipe
Tuesday, August 2, 2011
Days 10-13 of Fun Employment:
We started off with their yummy homemade bread & sopaipillas with pebre and Christian, Bernarda & Erica enjoyed some machas a la parmesana as well (I didn't get a pic of the machas, but here is one & a recipe if you want to check them out).
Wednesday, August 18, 2010
Weekly Recipe Round-up August 18th
- Chana Masala: When I first made Chana Masala, I used this recipe. Christian and I really liked the flavors of this dish and neither of us had ever had it before. This time around I used inspiration from that first recipe I found, plus this recipe too. In the end I served the Chana Masala with brown rice. I suggest making this recipe the day before you eat it as it gets even better when the spices can sit overnight! If you are looking for turmeric, try La Chakra on Mariano Sanchez Fontecilla (hint: it is called cúrcuma in Spanish). That is where I found mine!
- Lentil Tacos: I got the idea for this from this recipe, but I didn’t actually follow this recipe. I have made snobby joes (a version of sloppy joes but with lentils instead of ground beef) and so when I saw this recipe, I thought it’d be fun to try. Christian wanted ground beef so he made his meat as usual, adding in the taco spices. I boiled the lentils, and then drained them when they were done. I added some EVOO to a pan, threw in the lentils and stirred them so they could get covered with the oil. Then I added in the same taco spices and coated the lentils. We ended up having simple tacos that night—the meat/lentils, lettuce mix and guacamole in flour tortillas. Man, these were sooo good! It is pretty cool that you can substitute lentils for meat in some dishes and you really can’t tell a difference. I will definitely be making this again.
- Lentil Spaghetti Sauce: Well, we certainly had a week full of lentils. After having successfully made the snobby joes and lentil tacos, I figured this would be the same. I made the sauce using the bags of Italian tomato sauce from the grocery store, adding in garlic and spices as well as zucchini. I’d have to say it only turned out más o menos (so-so). Christian did not like it and I couldn’t decide if I did or not. Sometimes you couldn’t tell a difference in the flavor as normal spaghetti, but sometimes you could and those were the moments in which I did not like it. So I’d say it is a toss up as to whether or not I’ll make this again.
- Aloo Palak (Spinach with Potatoes): The author of this recipe states that it isn’t the most traditional Aloo Palak, but honestly for us it didn’t make a difference because we’ve never had an “authentic” version before. For some reason, I was intrigued by this recipe and decided to make it for lunch. I followed the recipe as is. She doesn’t list turmeric on the ingredient list, but in the instructions she does, so make sure you have some on hand. Both Chris and I loved the recipe, but we served it by itself and I think next time I will serve it with something on the side.
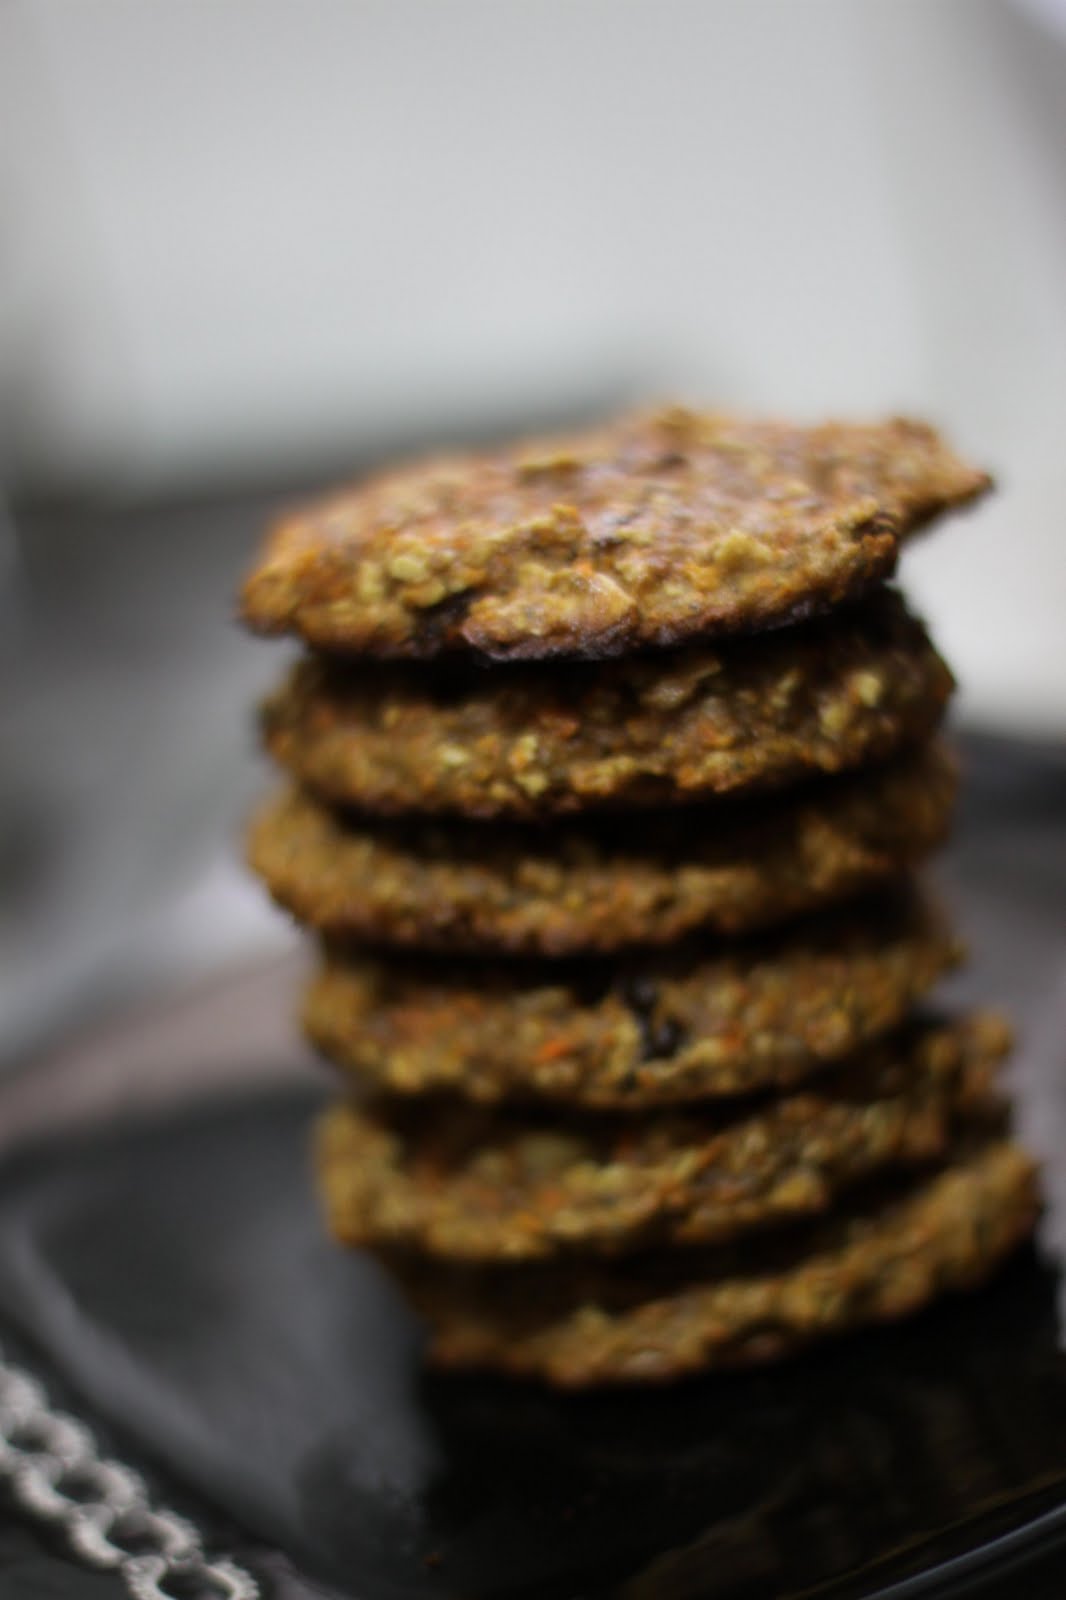
- Healthy Carrot Cake Power Scuffins: These are to die for! OMG! So good! I followed Angela’s recipe pretty closely, except for the maple syrup I used the imitation pancake syrup that we have. Unfortunately maple syrup is hard to find here and really really expensive, so I had to go with the Good Value brand of pancake syrup. I know, it is disappointing, especially since this syrup has high glucose corn syrup, but it is what it is. Next time I might substitute honey for the syrup and see how they come out. If you are looking for the spelt flour, check out Organisk in Providencia. That is where I picked mine up. I also stirred the coconut slice into the batter instead of sprinkling it on top. These got a big thumbs up from both me and the hubs. I took two to work to let some of my co-workers try and they all loved them too! Way to go Angela, thanks for posting such a delish recipe! I snapped some pictures of how mine came out (the picture above is of the scuffins too!):
Wednesday, August 11, 2010
Weekly Recipe Round-Up August 11th
- You, the reader, can learn about new recipes and give them a try.
- For those readers who live in Chile, you can not only learn about new recipes, but how to adapt them for the ingredients that we are able to get in Chile.
- It makes for good documentation in case I forget whether or not we liked a certain recipe, or what changes I made, etc.
- Vegetarian Paella: I posted the link to this recipe and the changes I made in this post, but since we hadn’t technically eaten it, I thought I’d elaborate a bit more. The paella was really good. The flavors intensified overnight and both Christian and I like it. I felt it needed a bit more though. Maybe chicken on the side (although that defeats the purpose of being vegetarian), or some beans or something else. The next time I made it, I might add in some other vegetables or perhaps add chickpeas and see what it gives the recipe.
- Quick Black Bean Soup: My friend, Kathy, who I studied abroad with in 2006 gave me this recipe. I think she made it for a party once and I really liked it and asked her to send it to me. That was 4 years ago and I just now made this recipe! The recipe states that it makes 4-6 servings, however for some reason we only got 3 servings out of it. I don’t have a link for it since I don’t know where she got it from, but I put the recipe at the bottom of this post with my changes in parenthesis. I will definitely make some version of this soup again, but I think I will tweak the recipe a bit.
- Butternut Squash & Fried Sage Pasta: When I came across this recipe, I thought “oh what a unique way to use butternut squash”. I kept imagining that this dish must have great flavors, even though I had no idea what sage tastes like. When I went to the grocery store last Saturday to buy the sage, it was nowhere to be found. Thanks Lider Express! I decided that it probably wouldn’t make a huge difference and plus we didn’t have anything else to eat. So I set out to make it. I followed the directions as they are (minus the sage) and the only change I made was to use some gluten-free pasta (rice based) instead of typical pasta. Why? Cuz we had it on hand and it was already open. I had eaten this pasta before and didn’t have any issues with it, but in this dish it was all wrong. Everything about this dish was wrong and neither Christian nor I could eat it. I was sad to throw away the butternut squash, but really there was no saving it. It had been mixed with the strange pasta and everything was contaminated. We aren’t sure if the sweetness of the butternut aided in making this a bad dish, but we won’t be making this again. It got filed under “Thumbs Down Recipes”.
- Black Bean Brownies: Yes, you read that right—brownies with black beans. See the beans covered in honey and cacao?
I saw this recipe a while back and have wanted to make them for a long time, so last Sunday was the day. I had to use old fashioned black beans since canned ones don’t exist here in Chile, and I think I measured out about 1.5 cups. I used ripe bananas and honey instead of the agave nectar. The first time I made them I did add the additional sugar, however with the honey and ripe bananas, it was too sweet. I topped them with sliced coconut too! These brownies came out really fudge like and only got more fudgy and “wet” as the week went on. Don’t get me wrong, they had great flavor and I really liked them, but they needed more oats to dry up a bit of the moisture. Here are some pictures of the first set:
I told Christian they were just brownies and he ate one. Then I told him what was in them! Hahaha. He liked them anyway and was surprised that you couldn’t taste the black beans. This past Friday I was invited to a friend’s house for girls’ night and I decided to take another batch of these brownies with me to see what they thought about them (again, not telling anyone what was in them until they had tried them). While everyone agreed that these healthy brownies don’t taste like your Betty Crocker childhood brownies, they all liked this “brownie” on its own. The second time around I increased the recipe a bit and changed the amount of oats, hoping they would come out more cake-like than fudge-like. I used 2 cups of black beans, 4 bananas, 1/3 cup of honey, about 1 TBSP of sugar, double the unsweetened cocoa, cinnamon and vanilla extract. I also started off putting in 1/2 cup of the oats and then increased it another 1/4 to 1/2 cup because they still seemed so wet. In the end, they baked quickly (whereas the first time around it took longer for them to cook) and while they were drier (but not too dry) they were dense. So you most definitely only needed to cut them into small squares to serve. I recommend trying this recipe and I will keep making them because while they may not have a “typical” brownie flavor, I bet heated up with vanilla ice cream, they would still be amazing!
- Lighter Sesame Chicken: As indicated in the recipe, I made brown rice (arroz integral) to go with the dish, which takes longer than white rice to cook. So if you do the same thing, make sure to plan ahead. I found out a few weeks ago that the ratio on the back of the brown rice bag is off. They say 1 cup of rice to 2.5 cups of water. That is only if you want soupy rice. We make 1.25 cups of rice to 2 cups of water and it turned out perfectly. So keep that in mind. Back to this recipe—it was awesome! We both really liked the flavors and lightness of it. The changes I made were to not cook the chicken in the egg and cornstarch. Instead, we just cut up the chicken, added a bit of sesame oil to the wok and cooked it with salt and pepper. Once it was done, I added in the sauce and the green onions (instead of scallions). I’d say cooking the chicken like this made the dish even lighter than it was intended. In the end, I plated it up with the broccoli and rice and the husband loved it (I did too)! Next time I will make more sauce as we felt adding more sauce over the broccoli and rice made everything even better!
- 1 Tbsp. olive oil
- 1 onion, chopped
- 2 (15 oz.) cans black beans, rinsed and drained (I used old fashioned cooked black beans)
- 14 oz. can chicken broth
- 15 oz. can corn, drained (I used frozen corn)
- 14 oz. can diced tomatoes with herbs (I used cut up fresh tomatoes without the seeds.)
- 2 bay leaves (didn’t use b/c I don’t have it)
- 1/2 tsp. dried thyme leaves
- 1/2 tsp. dried basil leaves
- 1 tsp. balsamic vinegar
- 1/2 tsp. cumin
Sunday, July 25, 2010
Weekly Recipe Round-up
- Curry Chopsui a la Heather: Delicious! I was a little nervous when making the coconut milk sauce because mixed with the spices, it seemed waaaayyy too strong. But once I put it on the veggies, it magically became perfect. I didn't use any meat by accident because we didn't have any chicken on hand. I served it with rice noodles instead of rice and I loved it as it was (veggies no más), however Chris definitely wanted chicken. He loved it too though, he as asked me several times to make it again and the only reason I haven't is because I need to pick up more coconut milk.
- Chicken with Artichokes and Angel Hair: I was super pumped about this recipe because, hello artichokes are delish, but unfortunately this recipe did not live up to its expectations. It wasn't terrible, it just seemed too greasy or something. Maybe that was thanks to breading the chicken? I don't know, but I won't be making this again.
- Indian Lentil Soup: I first made this with green lentils because I didn't have any red ones. It was super yummy and tasted even better the next day. I have now learned to make lentil soups one day ahead because they are a million times better the next day! I definitely plan to remake this recipe.
- Spicy Butternut Squash Soup: Amazing soup! First time I blended a soup to make it creamy after cooking it and you definitely can't skip that step. Just make sure to only fill up your blender 1/3 or 1/2 of the way so you don't burn yourself when blending. The changes I made to the recipe were: no rosemary, no bay leaves, no chili, no celery. I used chili powder from the States and doubled up on it since I didn't use a chili pepper. I used a mix of chicken and veggie stock (from bouillon cubes). I also added some black beans that I had frozen to give it a protein boost. Those got blended too. And the perfect side dish is homemade garlic bread! Oh and I didn't use the whole butternut squash, but about 3/4 of it. I froze the rest. The hubs loved it too! Here's a pic he shot:
- Red Lentils for 2: I doubled this recipe which is why it is "for two" instead of "for one" as the actual title of it. I served it with palta (avocado) on top and made it a day ahead of when we actually ate it. So yummy. You can get red lentils at Organisk. Even though I think the owner of the store is an a-hole (he is always rude to us for absolutely no reason), I still shop there because it is close to my house and has a ton of variety that you can't find elsewhere. Christian gave this a thumbs-up too.
- Curry Chickpea Burgers: I love Angela's recipes, but I can't normally make a lot of them because some special products that she uses are just not available in Chile. So I was super excited when I knew I could make this. Christian at them on a hamburger bun with gringo mustard. I ate mine alone, on the side of my Red Lentils for 2. I will definitely be making more of these and probably freezing some for a quick protein when I don't have other stuff in the house.
- Vegetarian Paella: Technically we haven't eaten this yet since I made it for lunch tomorrow and Tuesday along with the chickpea burgers, but I did steal a bite or two away to try it and yum yum!!! The changes I made to this recipe were: no green bell pepper (ew still hate these) and I halved the rice (arroz integral that is not quick cooking) and the veggie broth (I used 1 cup). Since the rice wasn't quick cooking, this recipe took about 45 minutes to cook up, and even reducing the veggie broth, it was moist. But not soupy. I am super excited about eating this mañana and am pretty sure I'll be making it again.
Saturday, July 24, 2010
Great Reads Page
- Chile Expat Blogs: blogs of other expats living in Chie
- Other Interesting Blogs: blogs of other people I know and/or enjoy reading
- Fitness/Personal Balance Blogs: blogs related to fitness, exercise, personal balance, being healthy, etc.
- Foodie/Recipe Blogs: blogs that post recipes that I enjoy
- Personal/Professional Development Blogs: blogs that discuss personal & professional development such as personal finances, etc.
- Stores About Dulcinea: links to all the blog posts I wrote at Who's Your Dachshund
- Dulcinea's Favorite Blogs: blogs of dachshund's that Dulci likes to keep up with
Tuesday, June 15, 2010
Green Monster Me!!!
Friday, May 28, 2010
All About Food
- Chana Masala---first time making Indian food! It was better the second day so I will now make this a day in advance of eating it. I put it over couscous which helps us eat up the ton of couscous I have in the pantry. For some reason, I just am not that into couscous anymore so I like to eat it with strongly-flavored foods so I don’t notice it.
- Minestrone soup—I used a mix of recipes to this and since it is supposed to be made with seasonal veggies, I just used what I had on hand: carrots, butternut squash, potatoes, tomatoes, peas and onion with black & white beans.
- Butternut squash & black bean soup—I use a cream of veggie or cream of chicken soup and just add cooked black beans and boiled butternut squash & potatoes (until they are softened). This is a rich and yummy dish.
- Chicken noodle soup--using my mom's recipe
- Quinoa and Black Bean Bake with Mozz. and Avocado—I made this super spicy and the avocado helps mitigate the spice. I also just used shredded parmesan since real mozzarella is hard to come by here.
Wednesday, October 14, 2009
White Cake & Cream Cheese Frosting Recipes
Basic White Cake (from here)
Ingredients:
6 tablespoons unsalted butter, softened
1-1/2 cups sugar
3 cups sifted* cake flour**
2 teaspoons vanilla
1 tablespoon baking powder (polvo de hornear)
1 teaspoon salt
1 cup milk
6 egg whites
*Make sure you sift your flour before you measure the 3 cups to be used. I don't actually own a sifter but I have some small strainers and used that for make-shift sifting.
**I have no idea if cake flour exists in Chile and I wasn't very interested in starting a search for it so I looked online and found out that you can use all-purpose flour to do the job. However, the ratio is not 1:1 which is where you have to be careful. I used harina sin polvos de hornear (all purpose flour w/o baking powder) since the recipe calls for you to add extra. In any case, the ratio that I found online for substituting cake flour for all purpose is: 1 cup minus 2 TBL all purpose flour = 1 cup cake flour. Did you get that? All purpose flour has more gluten than cake flour and if you use a direct substitution you will get a hard cake. So for every cup of cake flour that a recipe calls for, you should take 1 cup of all purpose flour and take out 2 tablespoons of the all-purpose flour. Again, I did this after I had "sifted" the flour.
Preparation:
Preheat oven to 325 degrees F (I have no idea how to measure this in an oven heated by actual flames, so I put it at a low-medium heat. Better to have less heat than more so you don't get burned cupcake bottoms, even if it takes a bit longer).
Grease and flour 2-9 inch cake pans (I used cupcake pans and put liners in them.).
With an electric mixer, cream butter and sugar (Anyone in Chile, this means use your elbow grease to cream the two.). Mix in vanilla.
In a separate bowl, combine cake flour, baking powder and salt with a wire whisk. Add flour mixture [to creamed butter & sugar] alternately with milk until all combined.
In a clean, dry bowl beat egg whites until stiff but not dry (this will tire our your arm for sure!). With a rubber spatula, add a scoop of egg whites to cake batter. Then fold in the rest. Carefully, divide batter between pans (or scoop into the cupcake pans).
Bake for 25 to 30 minutes (my cupcakes took approx. 10 minutes to cook). Test with toothpick for doneness. Cool cakes in pans on rack for 15 minutes. Remove to racks to cool completely.
Cream Cheese Frosting (don't remember where I got this, sorry)
Ingredients:
8 oz. pkg. cream cheese, softened
6 Tbsp. butter, softened
3 cups powdered sugar
Dash salt
2-4 Tbsp. light cream (I mixed regular cream with some 2% milk, or leche semi-descremada)
1 tsp. Vanilla
1/4 tsp. almond extract (this was my addition)
Food coloring if desired (also my addition)
Preparation:
In large bowl, combine cream cheese and butter and beat until light and fluffy. Alternately add powdered sugar and light cream, beating until desired spreading consistency. Beat in salt and vanilla and use to frost cake. (I separated the frosting into three parts and added food coloring to make pretty pink, blue and green cupcakes.)
Enjoy!!!
~Tyffanie
Sunday, November 9, 2008
Recipe: Red Pepper Hummus with Toasted Pita Triangles
Red Pepper Hummus with Toasted Pita Triangles (edited for life in Chile)
4 whole-wheat pita pockets, cut into triangles
Cooking spray
Garlic salt
1 cup dried chickpeas (ie. garbanzo beans)
1 cup sauteed red peppers
1/4 cup tahini (sesame paste, recipe included below)
2 tablespoons fresh lemon juice
3 to 4 cloves garlic
1 teaspoon ground cumin
Salt and ground black pepper
2 tablespoons finely chopped fresh parsley leaves (I personally didn’t use this.)
To make the tahini, you need 2 tablespoons of toasted sesame seeds, 1/2 teaspoon sesame oil (I used olive oil), 1/4 teaspoon salt and 1/4 cup tepid water. I would perhaps double or triple this recipe because it was hard to blend this all together in the 1-2-3 since it was a small amount. First, toast the sesame seeds until golden brown. Let cool off.
You need to put the sesame seeds in a blender or food processor and grind until smooth.
Then add the oil and salt. Process until combined. Add the water very slowly, with the motor running if possible, and blend until smooth. If you can’t add the water with the motor running, just add bits at a time and keep processing until smooth. Mine turned out a bit runny and not as much of a “paste”, but really, it is the flavor that is important here. One interesting thing that I learned about sesame seeds is that they turn rancid quickly so it is important to store them away from light & heat. According to one website that I found, putting your sesame seeds in the fridge will allow them to stay good for up to 3 months. Now that you have your tahini, here is the rest of the hummus recipe:
Rinse the chickpeas and mix with the red peppers, tahini, garlic, cumin, and lemon juice in a bowl. Place a portion of the mix in a 1-2-3 (the original recipe said blender, but the blenders in Chile are weak and don’t work that well—I found that although the 1-2-3 works much better even though you have to blend a little bit at a time). Blend until smooth, remove the mixture and put in a separate bowl. Continue with the mix until all has been processed. Mix the hummus together to make sure all the flavors and ingredients are distributed evenly. Season to taste with salt and black pepper and top with parsley, if using it. The hummus turns this beautiful, bright orange color thanks to the red peppers.
To make the pita triangles, preheat the oven or electric oven to 400 degrees F. Cut up the pita bread into triangles and place on the baking sheet that corresponds to your oven (I used our electric oven and it worked like a charm). Spray the surface of the triangles with cooking spray. Season the tops with garlic salt. Bake 6 to 8 minutes until golden brown and crisp.
Yay! Now you’re ready to eat your hummus and homemade pita chips!
Tuesday, September 9, 2008
Recipe: Vegetable Stir-Fry with Egg Noodles
I made a modified version of this recipe (on Sunday) that I got out of a healthy-food cookbook that I bought at Barnes & Noble hace algunos años (a few years ago). I don’t remember what the book was called and I only have pictures of the recipes that I liked (this was my last-minute-way of bringing good recipes with me to Chile without actually bringing the whole book—I didn’t have space in my suitcases!). Well the recipe is modified of course because I couldn’t find all of the necessary ingredients, but it turned out well so have fun with it. I’ll post the actual recipe and then in parenthesis, I’ll put my changes or comments just as I’ve done in previous recipes.
Vegetable Stir-Fry with Egg Noodles
Preparation time: 20 minutes (I think it really depends on how fast you are to cut up all the veggies, I happen to be a slow cutter)
Cooking time: 15 minutes
Serves 4
- 7 oz (200 g) dried egg noodles (I used whole-wheat pasta, couldn’t find egg noodles here)
- 2 tsp. canola oil
- 8 scallions (spring onions), cut into 1 in. lengths (I used 2 entire green onions)
- 1.25” x 1.25” piece of fresh ginger, julienned (couldn’t find ginger, so I did without it)
- 2 cloves garlic, crushed
- 7 oz (200g) Swiss brown mushrooms, quartered (I used normal white button mushrooms)
- 1 red pepper, seeded & thinly sliced
- 1 zucchini, cut on the diagonal into 1/2 in slices
- 1 carrot, sliced on the diagonal
- 10.5 oz. broccoli, cut into small florets
- 10.5 oz Chinese cabbage, shredded (definitely couldn’t find this...so I did without it)
- 2 tbs. hoisin sauce (couldn’t find this, but my search isn’t over yet; to bring the spicy aspect into the recipe, I put in some merken)
- 4 tbs. sake or dry sherry (didn’t have either so I mixed a bit of white wine with red wine)
- 1 handful cilantro leaves, plus extra to serve
- 10.5 oz packet of firm tofu, drained and cut into cubes (couldn’t buy tofu on Sunday, so I cooked some chicken beforehand to use in the recipe)
Bring a large saucepan of water to boil. Add the noodles and cook until tender, following the package’s directions. Drain.
Heat a wok over a high heat, add the canola oil and swirl to coat. Add the scallions and ginger and stir-fry for 1 minute. Add the garlic and mushrooms and cook for 1 minute.
Add the red pepper, zucchini, carrot and broccoli to the wok and stir-fry for 3-4 minutes. Add 1-2 tablespoons water to help steam through, if necessary. Add the cabbage, hoisin sauce and sake and stir-fry for 2-3 minutes, or until cabbage has wilted and all the ingredients are well combined. (I also threw in the chicken at this point so that it could heat up again.)
Toss through the tofu, noodles, and cilantro until well coated in the sauce and serve immediately.
Nutrition per serving:
Calories—411
Fat—10.4g
Carbs—47g
Protein—23g
Recipe: Warm & Nutty Cinnamon Quinoa from 101 Cookbooks
I found this recipe on 101 Cookbooks under the “quinoa” section. I love quinoa because you can use it in a variety of dishes, it easily replaces rice & noodles and it is a full protein. The best thing about finding this recipe is that I could actually make it here in Chile, along with a few modifications.
I made this recipe on Sunday evening and took advantage of using it as a dessert and breakfast yesterday morning! I will put up the original recipe and put my modifications in parenthesis to the side.
“... Also, a few notes and tips from the book: low-fat soy milk may replace the low fat milk, blueberries may replace the blackberries, dark honey may replace the agave nectar, and walnuts may replace the pecans.” (Don’t forget to watch the milk carefully when you boil it and then cover it because it has a tendency to rise quickly. I actually left the lid slightly ajar to ening...after it happened the first time.)
- 1 cup organic 1% low fat milk (lecha descremada en Chile)
- 1 cup water
- 1 cup organic quinoa*
- 2 cups fresh blackberries, organic preferred (I used frozen berries that I bought in the supermarket)
- 1/2 teaspoon ground cinnamon
- 1/3 cup chopped pecans, toasted**
- 4 teaspoons organic agave nectar, such as Madhava brand (I used Karo pancake syrup, because we happen to have it in our house, but you could also just use honey as mentioned above or throw in a packet of Splenda in the water-milk mixture.)
Combine milk, water and quinoa in a medium saucepan. Bring to a boil over high heat. Reduce heat to medium-low; cover and simmer 15 minutes or until most of the liquid is absorbed. (Remember, be careful here with the milk rising!) Turn off heat; let stand covered 5 minutes. (Since I was using frozen berries, I stirred them into the quinoa right when I turned off the heat and was going to let it stand for 5 min.) Stir in blackberries and cinnamon; transfer to four bowls and top with pecans. Drizzle 1 teaspoon agave nectar over each serving.
Serves 4.
*Rinse the quinoa in warm water before using it. This helps to remove the outer coating which tends to be bitter.
**While the quinoa cooks, roast the pecans in a 350F degree toaster oven for 5 to 6 minutes or in a dry skillet over medium heat for about 3 minutes.
Recipe: Perfect Popcorn by SimplyRecipes
Perfect Popcorn Recipe
Ingredients:
- 3 Tbsp canola, peanut or grapeseed oil (high smoke point oil)
- 1/3 cup of high quality popcorn kernels
- 1 3-quart covered saucepan
- 2 Tbsp or more (to taste) of butter
- Salt to taste
Method:
1. Heat the oil in a 3-quart saucepan on medium high heat.
2. Put 3 or 4 popcorn kernels into the oil and cover the pan.
3. When the kernels pop, add the rest of the 1/3 cup of popcorn kernels in an even layer. Cover, remove from heat and count 30 seconds. (Count out loud; it's fun to do with kids.) This method first heats the oil to the right temperature, then waiting 30 seconds brings all of the other kernels to a near-popping temperature so that when they are put back on the heat, they all pop at about the same time.
4. Return the pan to the heat. The popcorn should begin popping soon, and all at once. Once the popping starts in earnest, gently shake the pan by moving it back and forth over the burner. Try to keep the lid slightly ajar to let the steam from the popcorn release (the popcorn will be drier and crisper). Once the popping slows to several seconds between pops, remove the pan from the heat, remove the lid, and dump the popcorn immediately into a wide bowl.
With this technique, nearly all of the kernels pop (I counted 4 unpopped kernels in my last batch), and nothing burns. (I had between 10-14 kernels in the batch made by Christian)
5. If you are adding butter, you can easily melt it by placing the butter in the now empty, but hot pan.
6. Salt to taste.
Makes 2 quarts, a nice amount for two people, or for one hungry one.